Monday, August 12, 2013

A Few Punny Back to School Treats

Y'all know how much I love puns, so you knew I was gonna have to include some punny back to school treats for your kidlets in my back to school round-up, along with the sweet treats (click here for sweet treats, and here for apple treats).  With a few tweaks, these would work well as back-to-school gifts to give to your teacher or for a teacher to give to students, too.   Click on the links for free printables, or create your own.

Here they are, my friends...

You are one smart cookie, courtesy of The Crafting Chicks.


Smartie Pants Treats
Good Luck Smartie Pants, courtesy of Bunches and Bits


Looking forward to a WHOPPER of a year, courtesy of Simply Sprout.


You are O'FISHally in Kindergarten (or any grade), courtesy of Simply Sprout.
Or "It's going to be a FINtastic year" would work with goldfish crackers or Swedish fish.


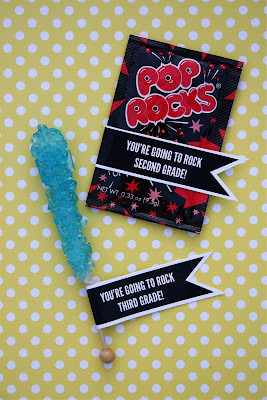
You're going to ROCK (any) grade, courtesy of Making Memories with your Kids.

 
 Easy and Inexpensive Back to School Teacher Gift
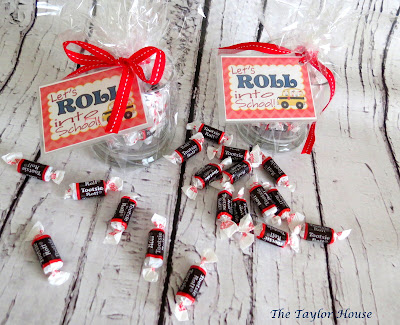
Let's ROLL into school courtesy of The Taylor House.


Back To School Cereal Box Treat
 "Cereal-ously" I wish you a great school year, courtesy of Teach with Me.  Use full size or mini boxes of your kids' favorite cereals.


Back To School Gummy Bear Treats
I hope you have a Bear-y special school year, courtesy of Teach with Me.  This would also work with teddy grahams, or even a small stuffed teddy bear, if you'd rather steer clear of sugary treats.


Back to School Treat
School Rules! Courtesy of Uncommon Designs Online.


Aim to be a cut above the rest, courtesy of Delightfully Noted.

 
And, of course, who can resist these wonderful puns, courtesy of...me!
"You've got the WRITE stuff," would also work with markers, pens, or pencils. 
Or for markers, you could say something like, "Mark my words: this school year is going to be great!"
 
 If you are a teacher giving a back-to-school gift to your students, I would suggest giving individual markers or pens :)
Happy, happy back-to-school treating :)


Sunday, August 11, 2013

Back to School Apple Treats

 Yesterday I shared some of the fun back to school treats that I've found around the web.  What I discovered during my research is that there are an awful lot of really cute apple treat ideas out there.  Anyone know why apples are associated with school?  I guess because apples are ripe in the fall?  But really, with tasty treats like these on the table, who cares why?  Let's eat! 
 
Here are some of my favorite back to school apple treats.
 
 
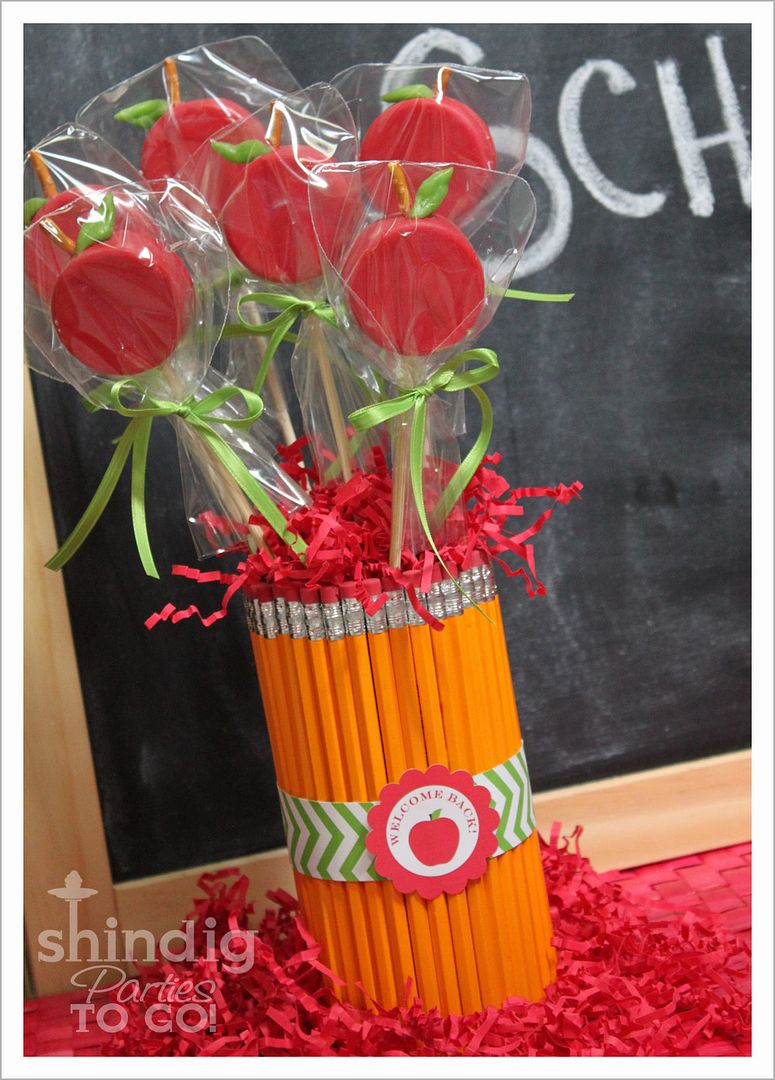
Seriously?  Yum.  Oreo truffles dressed up as apples.  Find out how to make them at Raising Memories.  You could also make these into cakepops.
 
 
Photobucket
These are oreos disguised as apples.  Talk about a tasty bait & switch!  Amanda Parker & Family made these.
 
 
These pretzel apples from Make Bake Celebrate look delicious!


Snickerdoodles are my kids' favorite cookies.  Why not dress them up like apples?  Burlap-n-Bling gives the how-to.


OREO-Apple Snack Stacks recipe
 

Love this idea from Kraft.  It's even sorta kinda healthy. 
 
 
Mini Caramel Apples - Step 2
Look at these cute mini caramel apples from Spoonful!  I imagine they're much easier to eat than full-sized caramel apples. 


Gourmet Mom on the Go uses a secret ingredient to color these rice krispie apples.
 

Guess how Anna and Blue gets these cupcakes to be so perfectly apple-shaped.  There's a mini donut under there!  Word to the wise: if you're not using gel food color, you might want to make granny smith or yellow delicious apples instead of these red ones!


Adorable Applesauce Cupcakes
 

And finally, I couldn't resist these applesauce cupcakes from Pillsbury :)

Well, my friends, what do you think?  Can you see my dilemma?  So many great choices; only one first day of school (well, actually, the kindergartner starts three days after the other two, so we do have two first days of school this year).  I'll let you know what I decide.  In the meantime, feel free to vote for your favorites in the comments.

Saturday, August 10, 2013

Back to School Sweet Treats

It's a bit of a tradition around here to make a special treat for the kidlets to enjoy after their first day of school.  This year, it's all the more important to keep this tradition going because my youngest is starting kindergarten.  That's right: all three of my babies will be in school!  This is definitely a reason to celebrate :)

So I've been doing a little research, trying to decide what to make, and I thought I'd share these terrific ideas that I've come across.  Maybe y'all can help me decide ;)

Aren't these blackboards sweet?  Crissy's Crafts shows how to make these.


Check out this cute bus cake from Sizzle N Spice.  I actually made this cake waaaaay back when AKD started kindergarten.  It's tempting to make it again...you know, a tradition within a tradition...but I think I'd rather make something new.


Aren't these little school buses, also from Sizzle N Spice, just adorable?!  Very simple to make, and a little better for ya than cake.

Like a Pretty Petunia offers a free printable to help you make these cute school buses from itty bitty candy bars.
 

Back to School Craft. A Pencil Treat with livelaughrowe.com
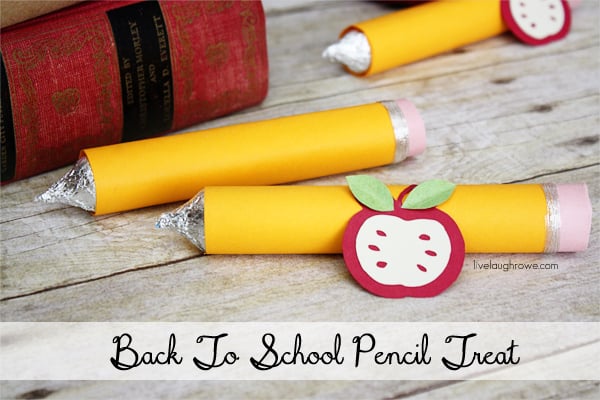
This is genius.  Live, Laugh, Rowe shows how to make these pencil treats using rolos and kisses.  If you don't have silver thread, just use aluminum foil.


Crafty Mischief whipped up a batch of these pencil-shaped cookies for her kiddos.
 
cute pencil cookies
 

Can you believe these colored pencils are actually cookies?  Very cool, from Lushome.
 
 
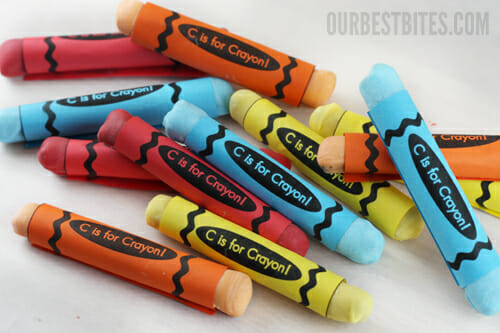
I love these edible "crayons" from Our Best Bites.


I made these cupcakes a couple of years ago, too.  For how-tos, head over to Sinful Southern Sweets.
 
I have a few more treats to share with you, but I think I'll wait until tomorrow for those.  What do you think so far?  Which of these treats looks the best to you?  Which one do you think I should make?  Let me know in the comments!

Thursday, August 8, 2013

Ice Cream Sundae Cake {a recipe. or perhaps, a general guideline}

You know how some families have birthday season?  Where all the birthdays are clustered into a month or two?  Well, if our family has a birthday season, this is it, with AKD's birthday near the end of July and Hubby's birthday less than two weeks later in early August.  I know.  Not much of a season, is it?  But, it's all we've got--the rest of us are pretty well spread out.

Anyway, Hubby was planning to be away from home, on a canoe camping trip, on his birthday this year, and we had a gift for Hubby that we knew he would want to use on the trip, so we decided to surprise him with an early birthday celebration.


The birthday boy enjoying his present
We tried to trick him into telling us what kind of birthday treat he wanted by doing something we sometimes do at suppertime.  Someone will ask a question, and then everyone takes turns answering it.  Discussion ensues.  This time, the question was, "what's your favorite dessert?"  And Hubby said, "ice cream."

Huh.  Not a very special treat for a birthday.

So I had to specialisize it.  (Yes, I know specialisize is not a real word)

Introducing the yummy, the delicious, the delectable...
Ice Cream Sundae Cake!
It's a cake!  It's ice cream!  It's a sundae!  It is so good.

Here's what I did:
  • First I added some melted butter (or margarine) to oreo cookie crumbs, and pressed them into the bottom of my 9" springform pan.
  • Next, I sliced a couple of bananas and layered them in the pan, drizzling liberally with caramel sauce.  I covered that with a layer of chocolate ice cream, then stuck it in the freezer for a bit to solidify.
  • The next step was to layer fresh sliced strawberries over the chocolate ice cream--you could use strawberry jam instead if you prefer.
  • Over the strawberries, I drizzled hot fudge sauce that I had heated just a little bit to make it pourable, and sprinkled on some chopped dry roasted peanuts.
  • On top of all that yummy goodness, I spread some vanilla ice cream, and stuck the whole thing in the freezer for about 4 hours to get good and solid.
  • Just before serving, I decorated the top with rediwhip and maraschino cherries.  Oh, and candles.
Yum-o!


That's just what I did, of course!  Feel free to accessorize your ice cream sundae cake however you want.  Add more or different flavors of ice cream, like strawberry or cookies & cream.  Add more or different topping choices, like creme de menthe, toffee, or pineapple topping.  Sprinkle those oreo crumbs on the top.  You can even (gasp!) leave the candles off.

Enjoy!

Wednesday, August 7, 2013

The teenager's bike/river/waterfall cake

Approximately 2 days before his 13th birthday, my oldest son informed me that he would like a mountain biking cake. 
 
Oh, and while I was at it, I should add a bridge in the trail, over a river with a kayaker in it, and a waterfall.
 
Apparently he's still in the "my mom can do anything" stage.
 

So, I did what I could. 

To make this cake, I used two 9 inch round cakes.  I placed one cake, curved size down, on the plate.  Then I leveled the 2nd cake, and put it cut-size down on top of the other.  To form the river, first I frosted the top of the cake blue.  Then I cut a channel from the scrap, and placed the two pieces on top of the cake.

The next step was frosting.  I used a basic buttercream recipe, tinting about half of it green and a little bit blue.  I added baking cocoa to about 1/3 of the frosting to create the brown for the path and rocks.

 
I completed the waterfall by frosting down the side of the cake with blue.  If you'd like to make yours a little more waterfall-ish, you can cut a wedge from cake scraps and glue it to the side of the cake to make the waterfall a little more cascading.

Next, I frosted the green parts, and finally I added the bike path.  To clean up the transition along the edge of the path, I piped a line of chocolate frosting along the sides.  I also piped chocolate frosting on the banks of the river, and used a wet finger to smooth it into place.


The bridge is, of course, 3 pretzel rods.  I added some chocolate frosting rocks to the river, which caused a little bit of whitewater (white glittery gel icing).  I also sprinkled some blue sugar into the river to add dimension.

We looked everywhere for a cake-sized bicycle.  Could not find one, so I put some melted chocolate into a plastic bag, cut off a corner, and piped a bike shape onto wax paper.


The bike was too fragile to peel off the wax paper, so I just stuck it, wax paper and all, to the side of the cake.  Once it was stuck, I was able to peel the wax paper off.

By the way, I found some cute little wire bicycle paperclips the very next day.

 
I didn't even bother trying to find a cake-sized kayak and kayaker.  But I did spend a good amount of time trying to decide if I thought I could make one out of...something.  Maybe if he'd given me three days...

 
After all of that, what really matters is: does it taste good? 
 
And the answer? Yes. 
These were the 10th & 12th birthday cakes.
The boy likes his waterfalls...


Monday, August 5, 2013

A Fruity Mission

Good gracious, those folks over at Smiley360 are really concerned for my well-being.  Now they've sent me something for my digestive health: FiberChoice® Fruity Bites.

FiberChoice Fruity Bites
What's the one thing our doctors are always telling us?  Eat more fiber!  Fiber is a wonderful thing.  It helps regulate your digestive system and blood sugar levels, helps you feel full longer, and can help lower cholesterol and lower your risk of heart disease.  It's like this magical substance, and yet most Americans don't get enough fiber in their diets.
 
Each serving of these gummy supplements contains 3 grams of 100% natural fiber, which is as much fiber as 2 cups of spinach.  This makes FiberChoice Fruity Bites an easy, and tasty, way to bridge the gap between the fiber you should be consuming and the fiber you actually eat.
 
I do prefer to get my fiber from the foods I eat, but it's hard to do, and these fruity bites can help.  They come in an assortment of flavors: cherry, pear, and blue raspberry, and taste like fruit snacks.  The texture is nice and soft--I was expecting something like gummy bears, but these are much easier to chew.
 
The best part?  My kids love them!  They have no idea they're eating the fiber equivalent of 2 cups of spinach--they think they're getting a treat.  This is an excellent way to sneak a little fiber into the diets of kids age 6 and up.
 
Want to try them?  For more information about FiberChoice® Fruity Bites, plus a $2 coupon, click here.
 
Thank you to Smiley360.com for providing this product for me to try, free of charge, for the purposes of this review. All opinions are my own.

Sunday, August 4, 2013

Pressure Canning Dry Beans

I like beans.  For all the obvious reasons--they're a great non-meat source of protein, with around 7 grams per serving, and contain a whopping 14 grams of fiber per serving, which means they help regulate blood sugar levels and help you feel full longer.  Oh, and they taste good, too :)
 
But there's a problem with beans.  They have to be cooked.  And bean cooking requires some serious planning-ahead-ing, something I am occasionally good at, but not when it comes to beans.
 
Now, when I do remember to plan ahead, and manage to attempt to cook beans, one of two things happens.  Either they are underdone (crunchy beans anyone?), or they are burned.  There is no in-between.  Beans are something I've never managed to master cooking.
 
Now, I could just use commercially canned beans, however, commercially canned beans contain an awful lot of salt, and I can do without the salt.  Even if I buy no-added salt beans, they're kind of expensive.  Average regular price for a 15 oz can of pinto beans at my grocery store is $1.20.
 
Guess what I discovered, though (this is so exciting).  If you can your own beans, you don't have to cook them first!  Yay!
 
So, here's what you do.  Rinse and pick through 2 pounds of dry beans, taking out any rocks or weird looking beans.  Put 'em in a large pot, cover with 2-3" of water (2-3" above the level of the beans), and let 'em soak overnight, 12-18 hours.
 
Now, there are folks out there who skip the soaking step, and their beans turn out just fine.  I've experienced mixed results when I can beans that way, so I soak.  It's up to you.
 

Once your beans are soaked, divide them equally between 5 quart size jars (or 10 pint size jars)--I got a little over 2 cups of soaked beans per jar--fill the jars with boiling water, leaving 1" head space, use a plastic scraper to release any air bubbles, and place hot lids and bands, tightening just finger tight.

(If you don't soak, use 1 cup of dry beans for quarts or 1/2 c. beans for pints)

Thanks again for "lending" me your pressure canner indefinitely, Mom & Dad :)
Place the prepared jars in your pressure canner, and follow the directions to process your beans for 90 minutes for quarts (or 75 min for pints)--remember to adjust for altitude, if necessary--at 10 pounds of pressure.


That's it!  The beans cook while they're in the canner, and are ready to use in your favorite recipes.

Oh, by the way, you don't actually need a pressure canner to can beans!  If you have a pressure cooker (I'm talking to you, Chip.  Oh wait, you don't like beans), you can do this, too.  Just find a rack that'll fit your pressure cooker to keep the jars up off the bottom of the pot.  Easy!

Now I picked up these particular beans on clearance at Target for $1.34/2 lbs, but even at regular price, these are a great deal.  Regular price for 2 lbs of pinto beans at Aldi is $1.79.  Each of these quart jars is equivalent to about 2 cans of beans, which makes these beans about 18 cents per can--without the added sodium.  And I didn't have to cook 'em!

I like to mash these up with a little garlic and cumin to fill tortillas, or use them in chili or my very favorite soup which I could eat for every meal: Taco Bean (click here for the recipe). 

Happy bean canning!

Saturday, August 3, 2013

Home Made Almond Butter {a Recipe} (If you can call it that)

Hey, y'all!  You may remember this post where I talked about recipes using various crushed legumes.  Ever since making my own peanut butter (yum!), I've wanted to try making other nut butters.  Because, honestly, it's so easy (and yummy)--why not?


Mmmm...Home Made Almond Butter
So my cousin-in-law, who has been suggesting yummy vegan recipes for me to try...you know, just for fun, because we would have a full-scale revolt going on over here if I tried to make my family eat vegan...uses a lot of almond butter.  And I just happened to buy a 3 pound bag of almonds yesterday...

I can hear you now: ...and just how, dear Scarlet, did you just happen to buy a 3 pound bag of almonds? 

Well, you see, it was open house weekend at Sam's Club (still is, by the way), and I went looking for chia seed, because, you know, yum, and they didn't have any chia seeds, which was a huge disappointment, but in order to salvage the trip, I bought 4 items, only one of which was actually on my list, all from the same aisle, and it was the baking aisle, of course, and the almonds worked out to less than $4 per pound, which is a phenomenal price, so I bought 'em.  And promptly divided them up into 1 pound portions and put them in the freezer, because 3 pounds of almonds might last me 6 months (unless AKD gets ahold of 'em--then they'll last about 2 weeks).  I also have 2 pounds of walnuts (which will last significantly less time than the almonds) and 2 pounds of yeast (which will probably last til AKD's in college) in the freezer, along with 4.5 pounds of chocolate chips.  But that's a story for another time.

So!  As I was saying, I just happened to buy a 3 pound bag of almonds.  And I really don't know what came over me.  I was thinking about green smoothies, watching a show about hunger in America, and then all of a sudden I was making almond butter. 

And you can, too.  Here's what you need to do. 

You get some almonds.  And then, you whir them around in a food processor until they're the consistency you like.


First it becomes crumbly.  Keep going.


The almond butter forms a ball.  Keep going.


Finally, the oils release and the almond butter is done. 
Add a pinch of salt, sweetener, or other flavors (chocolate almond butter, anyone?)
or add a bit of oil to make it more spreadable.
 That is it, my friends.  If you like, you can add a bit of salt and/or the sweetener of your choice and/or a little bit of oil for a thinner consistency (I think coconut oil would be wonderful for this), but really, all you need to do is put almonds in a food processor (and might I add, I don't even have a very good food processor--just the el cheapo one from a mass merchandiser).


Num!

Enjoy!  Next up: cashew butter...

The Bzz About Clean

For as much as I hate cleaning, I sure do spend an awful lot of time doing it.  That's why I was excited when BzzAgent.com sent over a few of the new Lysol Power & Free products for me to try.
 

Lysol Power & Free products use the power of hydrogen peroxide to penetrate messes without the use of harsh chemicals like bleach. Anything that saves me time while cleaning is a winner in my book, so I wasted no time putting these products to use in my kitchen and bathroom.

Before

First I attacked the stovetop, a task I dread.  A recent (and by recent, I mean sometime in the past 3 months), boil-over left one of the burner wells caked with grime, and there were various other unidentified messes.  I sprayed the whole thing liberally with Lysol Power & Free Multi-Purpose cleaner, and waited about 5 minutes before scrubbing with a rag.  That boil-over cleaned right up, and as I scrubbed, even some of the stains that had been there for as long as I could remember were disappearing.  With a rag, people! 

I resprayed, let it sit for another 5 minutes, and this time used a scrubby sponge.  I tell you, my stove top is cleaner than it's been in years.


After

Next, I moved to the bathroom.  Now, for those of you who don't know, I am the lone female in a house full of boys.  Three of them.  Four if you count my husband.  And I love them.  I really do.  But their aim?  It leaves a little something to be desired.  I really thought their aim would improve as they got older, but it hasn't.  If anything, it's gotten worse.  It is gross, my friends.  It looks gross, it smells gross.  My bathroom is gross.

I will spare you the before and afters on this one, my friends. 

You're welcome.

Lysol Power & Free Multi-Purpose Cleaning Wipes are so convenient and easy to use, I can just give that gross floor around the commode a quick wipe every day.  I love the soft, rag-like texture.  They work well, clean up the mess, and leave behind a pleasant scent, in less than a minute.  These have become my new favorite cleaning wipes.

The best part?  There are no harsh chemicals or fumes in these products, so I don't need to wear gloves or worry about using them around my kids (or making the kids use them).  And this stuff doesn't just clean.  It also kills up to 99.9% of viruses and bacteria when used as directed.

So, my friends, with Lysol Power & Free cleaners in my cleaning arsenal, I'm spending a little less time cleaning these days, which is a good thing, because believe me, I've got plenty of better things to do!

 
For more information about Lysol Power & Free and other Lysol products, or for coupons and other special offers, click here.
 
Thank you to BzzAgent for providing these products free of charge for me to try.  All opinions are my own.
Related Posts Plugin for WordPress, Blogger...