I find that offensive.
That same announcer won't dare to say Merry Christmas in 6 weeks. Why is it that he can mention Halloween, but not Christmas, hmmm? Something to think about.
Another someone, not one of the announcers, was quoting scripture to illustrate what our team needed to do to win.
Let us not become weary in doing good,
for at the proper time we will reap a harvest
if we do not give up.
Galatians 6:9
That was interesting--he sounded very....passionate. But he wasn't saying it in a God-is-on-OUR-team's-side way, he was just saying that God's wisdom applies in ordinary, every-day circumstances, even in football games. That's a good thing to remember, every day. Feel free to think about that one, too :)
Alright, so I wanted to break the following up into two posts, but I did a media fast on Saturday and didn't get to it on Sunday, so it's all going down here. Hope I don't lose anyone...
In honor of today's Happy H-H-Holiday, we made some fun little creepy things last week.
We made these spiders (who spent much of the day being chased by owls, but that's another post):
And some webs for them:
We also made these glue ghost window clings (they really stick to the windows):
And we had fun with pumpkins.
We did some pumpkin-themed sequencing:
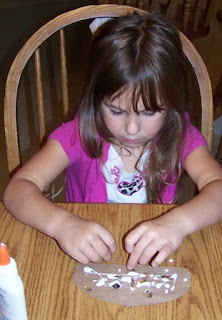
And made these mosaic pumpkins (or quilt blocks?)
(You can see the finished mosaic in the above photo):
It was such a treat to watch the light of discovery in the kids' eyes as they discovered that two right triangles make a square.
And, of course, pumpkin muffins:
And now, on to the next h-h-happy h-h-holiday!
How to:
Spiders: you will need 2 pipe cleaners, 2 pom poms (same size or different sizes), and 2 (or more) googly eyes. Cut the pipe cleaners in half, then stack them together and twist in the middle to form 8 legs. Bend each leg in a Z shape. Glue the pom poms together, and glue eyes on the head, then glue the head/abdomen to the legs. Remember to let it dry before playing with your spider!
Spider web: you will need a heavy duty paper plate (like Chinet), black yarn, and a hole punch. Punch holes around the edge of the plate--we used 6" plates, and made 8 holes. Cut a length of black yarn and tie one end to the plate through one of the holes. Lace the yarn through the holes in the plate, making sure to criss-cross the plate. Tie the yarn off when your spider web is webbed to your liking.
Ghost Clings: line a tray or baking sheet with waxed paper. Draw a ghost outline on the wax paper with regular school glue (I used a marker first, then traced with glue). Fill in the ghost with glue--use a toothpick or straw to spread the glue around. We also added googly eyes to our ghosts. Let dry (this might take a couple of days, depending on how generous you choose to be with the glue), then peel carefully from the wax paper. To apply to the window get the back of your cling wet. Very wet. This next part is very messy, but don't be afraid. Apply the cling to the window and hold for about 30 seconds until it stays by itself. When it's dry, use a paper towel or cloth and glass cleaner to clean around your cling. To remove the cling, peel off, then use glass cleaner to remove any residue.
Pumpkin Quilt Blocks: you can, of course, print off the materials provided by Making Learning Fun for this project, but I decided to make my own grid, with 2.5" squares, to make it easier to use a paper cutter to cut my blocks. If I were to do this again, I would either print my grid on colored paper, or use colored paper (perhaps yellow) in place of the white blocks--the kids didn't see any point in gluing white paper on top of white paper, and I can't say I blame them.
Pumpkin Muffins (thanks to my sis, Buckwheat, for the recipe): Add a 15 oz can of pureed pumpkin to a cake mix--any flavor (we used spice, and the muffins turned out a nice orange color, but I've heard that yellow cake and chocolate cake also are delicious for this recipe)--and stir until combined. Bake, using the cake mix instructions for cupcakes. That's it! So easy, and so moist and delicious! We made ours in my Nordic-Ware mini bundt pan (similar to this one), so they'd look like pumpkins, and added a lime tootsie-roll stem to each.
Bonus craft:
3-D paper pumpkin (we did make these, but I didn't get a picture. Hopefully you can imagine what I'm talking about): Trace 6 circles onto orange paper and cut out--ours were about 3 3/8" diameter, so that we could fit all of them onto one sheet of paper. Fold each circle in half, and glue half of each circle to half of the next circle until you have all 6 stacked on top of each other--it'll be in a semi-circle shape. Glue the very top half to the very bottom half, et voila! you have a sphere (sort of). Add a brown or green stem, and you're done. This one kept Bubby busy for a good 15 minutes while we were at karate, and his circle cutting improved immensely over the course of the project. Click here for a similar one (with a picture!)


